How to Replace Well Pumps?
If you live outside the city limits, You can get your water supply from a well. The most important part of your well system is the well you use in your well. how pumps …
Table of Contents
Called diver or deep well diver. S u You can use a jet pump if it is close to the surface or if your water is deeper than 10 m deep, you can have a submersible water diver system.
If it breaks, you may need to replace it with a new one. Follow these instructions to replace the well pump.
How to Replace Well Pumps? First Preparation Phase
Why do pumps break down?
Before starting any of the following, be sure to first establish that it is in use by properly troubleshooting and checking other components in your well system based on the symptoms present.
It can easily break down due to lack of water, running without water, irregular electric current. Try to understand why the pump broke down, always consult a specialist if you are not sure.

Buy a New Well Pump
*Determine what kind of need you have. You can buy the same one according to the values of the broken one or you can prefer equivalent. While it can normally suction between 7-10 meters, you can supply deep well submersible types at 100-200 meters depending on the depth of the well.
*Before installing the new one, it will help you to learn the power values, the amount of water per minute and the size of the well.
*When replacing submersible pumps, make sure you get it right. Before making your choice Kampa at can examine the water divers found, you can get information by contacting us.
Disconnect Electricity.
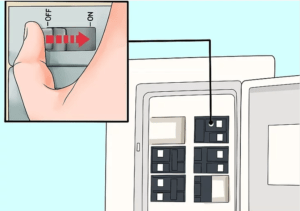
Electrical panels control the flow of electricity to your home. There should be a separate switch, turn this switch off. If you are not sure which switch it is, turn off the main switch.
Drain Existing Water.
Open the faucet to let the water drain and release the water and pressure from the tanks. Since you are installing a new one, you need to drain the water from the system.
How to Replace a Jet Pump?
Use a wrench to remove the inlet and outlet connections of the old one in your well.
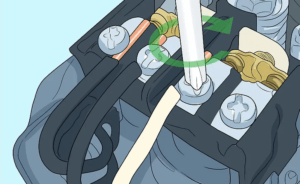
pressure in the old jet pump with a screwdriver remove the wires from the switch to.

Remove the old one completely.
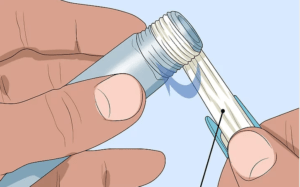
Apply Teflon pipe tape to the threads of the outlet and inlet pipes, wrap it around each pipe at least 5 times to get a proper seal. When replacing well pumps, you need a good seal to prevent water leakage. Click to sealing tape bant price.
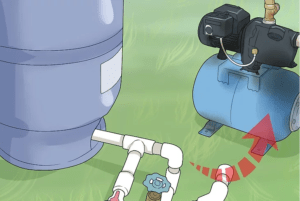
Screw the pipe from the reservoir or inlet pipe to the inlet pipe of the jet pump with a wrench.
Screw the pipe bringing the water into the house or outlet pipe to the outlet pipe of the jet pump with a wrench.
Manufacturers usually include all the details in the user manual. Use these manuals for installation. Follow the instructions.
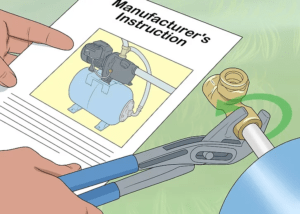
Connect the wires to the appropriate places on the pressure switch of the new pump. Tighten the wires to the electrical terminal with a screwdriver. Make sure that the motor is crowded for the same voltage as coming from the circuit breaker.
If the voltage is not the same, reconnect the pump motor to the appropriate voltage configuration according to the manufacturer’s instructions.
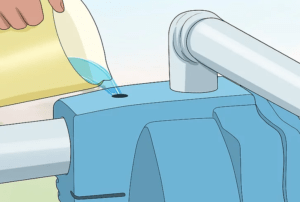
Jet pumps must be prepared for use before use. Fill it with water through the outlet pipe coming out of the top or through a suitable access hole.
Pour water until full. Proceed to the next step.
If it loses power, does not function adequately or does not pump water after bleeding, it may indicate other problems with the water system (i.e. bad check valve) or the well itself (i.e. drilled hole) (pipe, blocked point/jet).
A problem of this nature may be that the old product has caused a malfunction, which may not have been readily apparent up to this point.
Re-open the switches you turned off.
How to Bleed Well Pumps?
Watch to find out.
How to Replace a Submersible Pump?
Submersible installation is generally more difficult than Jet ones. As the well depth will increase and installation is challenging, make sure to get help from an expert if possible.
The main materials you will need are a wrench, steel rope for pulling and lowering, protection and control panel, torch, teflon plug.
Before you start, you can gather the materials.
- A specialist or someone else to help you
- A powerful flashlight (white light will be better)
- Pipe wrench and suitable water pipes
- Wrench
- Insertion kit
- Pliers
- Electric tape
- Sleeve
- Check Valve
- Strainer
- without protection and control panel
Determine what type of system is used to connect the pump and drip pipe to the water line to the pressure tank.
Caution: While this article attempts to be as informative as possible and to cover a variety of situations, it carries inherent risks and circumstances that could lead to the loss of and well pipe and cause serious injury to persons involved in it.
Please consult appropriate professionals for the above-mentioned procedures.
Open the well cap (if you have a capped well). The well cap is on the round metal piece that comes out of the deep well and gives you access to the submersible pump.
Remove the hex nuts that hold the cap in place with a wrench. 7/16″ is a common size for many covers.
Some older covers may use small hex bolts mounted horizontally (same system used with 4″ metal vent covers). Lift the well cap off the well casing.
Pull up the nuts on the extra rope and electrical cables. Inspect the nuts for tightness and check the cable for damage. If a nut is loose or a cable is broken, troubleshoot and test its function.
If it is not resolved or if no problems are found, continue disconnecting the cables, paying attention to which cable is connected to whom. At this point, you will need the power of yourself or your assistant.
If there is a control board, be sure to press the reset button. After that, use a multimeter to test the cable feeding the well.
Diagnose and correct the problem before reconnecting and retesting the pump function. If this is not the problem, proceed to the next step.
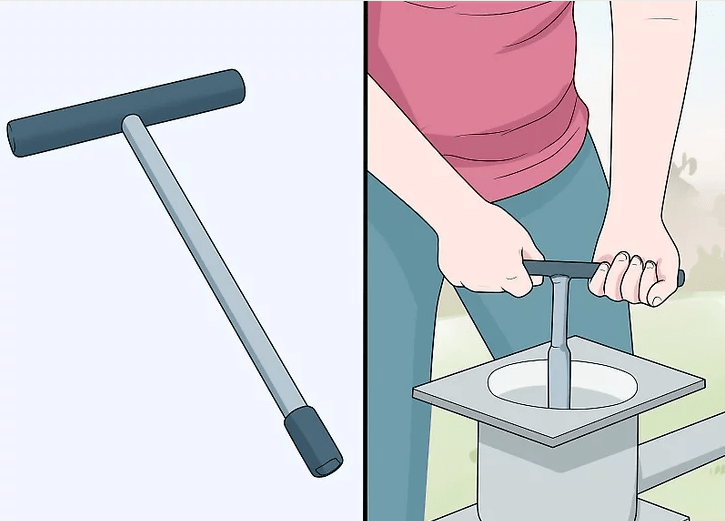
Install the T-handle and prepare to pull the pump. Build a T-handle using galvanized steel pipe and pieces corresponding to the size of the adapter (1″ or 1-1/4″). Do not replace the specified material with PVC (not strong enough) or other metals (more expensive).
For the installation of the tee:
1Tee
3 pieces of 12″ long or 6 pieces of 6″ nipples joined with 3 pieces of pipe.
The installation is quite simple. One meter of pipe on each side of the Tee. Tighten all connections completely.
Add a slightly longer pipe to the bottom of the Te and you will have a T-Handle. You can make it ready for use by adding a coupling to the bottom of the Te.
Attach to the end of the T-stem and attempt to thread if the male threads do not connect. Ungrooved threads may be damaged or contaminated and poor connection may result in loss of pump and pipe.
If you have made a successful connection, tighten by hand, tighten two turns with a pipe wrench to complete the hand tightening, move on to the next step.
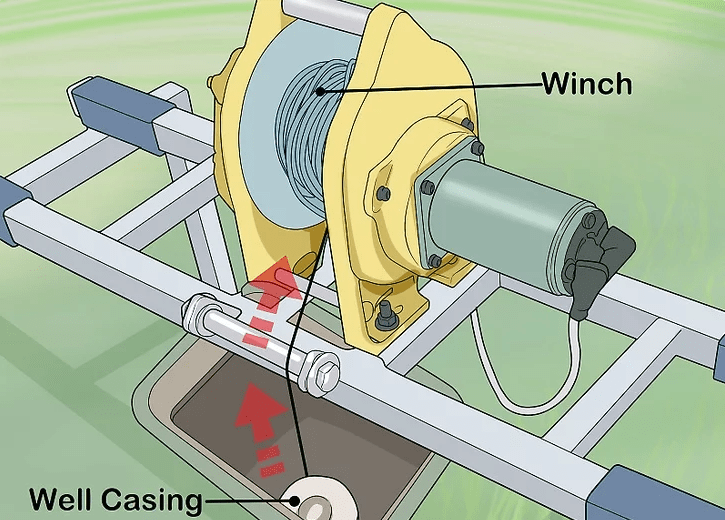
Take it out of the hopper with a crane. The winch can be submerged in water. It has the power to pull the product without damaging the case or yourself. The pulling method to be described here is a variant of the “double dog” method.
While there is no standard method for pulling well pumps, it will most likely be the easiest method for the types of equipment available. People using this guide.
If the product is under 2 hp / 3 hp and you and your helper are strong enough, you can consider pulling it by hand. But if you are going to pull a product with higher power, you should definitely use a crane.
In 4-5 inch cases, rust build-up on the inside may cause it to close or may not allow it to be replaced.
In this case, consult a specialist to find a workable solution to the problem. Do not force the product and the pipe. Otherwise you may break the pump and pipes.

After removing the pump by hand or with the help of a crane, start to remove the hose/pipe connections.
If the pipe is galvanized steel pipe, inspect for rust. If the pipe is rusted and/or covered with rust bubbles, do not use the pipe again.

Replace with new galvanized or use PVC.
Be careful not to damage the threads on pipes or fittings.
Refer to the manufacturer’s installation instructions to install the new one.
If no obvious defects are found, test the old wire rope for soundness. If it is sound, you can use the same rope again. If not, you will need to buy a steel rope.
The submersible pump you have purchased will have a cable for electricity, but you may need to buy a TTR cable in case there is no cable or it is missing.
You may want to clean your existing well before releasing it. You can read our article to learn how to clean your well.
Now you can release the pump into the well. You can use the same system when releasing it into the well as you used when pulling it out.
Open the switches by installing the panel. Check whether it works or not.
Now you can take a breath if it’s ready.
We tried to understand how to replace well pumps (jet and submersible). I hope it was useful.

