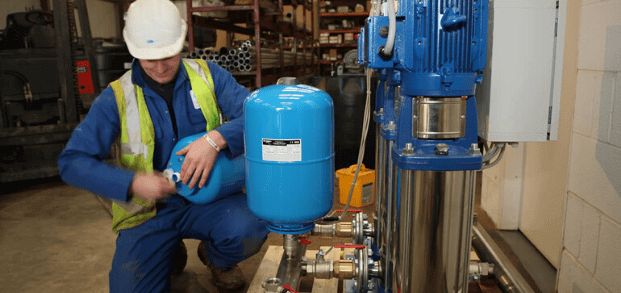
12 Tricks in Booster Installation
It is very important that the booster installation has ideal features for the long-lasting and efficient operation of the hydrophore purchased to pressurize your water.
How to adjust the booster connection in a good way.
Boosters in general;
- Drinking and daily consumption water,
- Where pressurized water is required
- Heating and ventilation systems
- Irrigation and sprinkler systems
- Used in fire extinguishing systems.
The way of operation of the hydrophores we encounter in different types and features is the same.
Based on the questions coming to our call center, I decided to write this article on how to install the booster. Let’s examine together how the water installation connection, electrical installation connection, starting from the foundation, how to start the first work.

Booster Assembly and Connection
- Before starting the installation of the water heater you have bought from the internet or from the store, be sure to check it with your eyes and check whether there is any damage.
- If you are replacing an existing product with a new product, always make sure to disconnect the power before any work is carried out .
- The power line you will use must have a ground line. The product and installation must be grounded strictly in accordance with the technique. If it cannot be grounded for any reason, that line should not be used.
- Site selection must be made before starting the booster installation. It should be positioned on a hard ground in a place that will not be exposed to external factors such as rainwater and sunlight.
- The booster installation must be carried out by qualified technicians in accordance with the details, regulations and standards specified in the water installation connection, electrical installation connection sections. Other applications may cause damage to the hydrophore and other equipment around it. It may pose a danger to life.
Water Plumbing Connection
- Boosters should be fed from a water tank, and care should be taken not to be connected to the city network or to suction from the well. Because water may be cut off in the city network or well, sandy or dirty water may come. Lack of water can cause the engine to burn out, and exposure to dirty water can cause the shaft and propellers to wear out and become inefficient.
- When installing the booster, the water installation must be done strictly according to the diagram .
- The floor to be installed should be placed on a smooth concrete floor parallel to the ground surface.
- If it is suctioning from a tank at the same level, its chassis should be at a lower level than the tank it is suctioning from. For this reason, it does not malfunction because it is constantly fed with water.
- If suction is made from a deep well, a strainer with a flapper must be installed at the suction opening and the flapper must be at least 30 cm above the bottom of the well. Suction depth may vary according to the pump used. Booster pumps with centrifugal pumps can suction from a depth of 6 meters, jet body pumps from a depth of 9 meters, vertical shaft booster pumps from a depth of 3 meters.
- When assembling, it must be ensured that all connections in the suction line are absolutely leak-proof. Otherwise, air will leak into the suction pipe and the pump will not suction at all or work below its capacity. If possible, the suction pipe should be tested with pressurized water to check for leakage.
- The suction line pipe length should be as straight and short as possible, avoiding the use of excess fittings.
- During the installation of the booster, valves should be installed at the inlet and outlet. It is important to disconnect the water from the hydrophore in case of failure.
- The code of the suction pipe must not be higher than the pump inlet axis code. Otherwise, air is collected in the higher parts of the suction pipe and the efficiency of the pump decreases.
- The float to be installed in the water tank prevents the pump from being damaged by preventing it from running without water when the water in the water tank runs out.
- The suction line of the hydrophore and the water tank should be at the same level and straight.
- At most one plastic or valve must be installed on the suction line, the outlet sleeve of the water tank must be of the same diameter as the suction pipe and connected to the suction line 15 cm above the bottom of the water tank.

Electrical Installation Connection
- Always disconnect the booster from the power supply before any work is carried out on it and make sure that no accidental connection is made.
- Cables and installations must not be energized while any work is being carried out on them.
- There must be a ground line in the electrical installation. The product and the installation must be grounded in accordance with the technique.
- Pressure Switch Adjustment: Pressure boosters leave the factory with the pressure switch adjusted. Do not play with the settings of the pressure switch.
- You can start the product by plugging the power cable into the power supply.
Initial Start-up and Operation
- Check the water and electricity connection again.
- Check for water leakage in the system.
- If suction from the water tank; open the suction line valves and pump air vent plug. Check whether the water reaches the pump. When the water reaches the pump, close the pump air vent plug.
- If suctioning from the well, open the pump bleed plug, fill the suction line with water and close the plug.
- Check whether the phases from the mains are complete.
- Switch it on.
- After the booster is installed, observe from the pressure gauge whether the water is flooding the installation. It will stop automatically when it reaches the set maximum pressure.
During booster installation, open a valve or faucet from the pressure line and observe the pressure drop on the pressure gauge. The pump will automatically restart at the desired pressure.
You can do it yourself, but we recommend that you have it done byan authorized service considering the warranty conditions . You should also consider getting technical support from a professional for water connection and electrical connection.
When your booster installation connection is made, you may encounter some unwanted minor problems. Before contacting the service, you can review our blog post Why Booster Boosters Fail by clicking here.
If you are thinking of replacing your existing hydrophore or buying a new product, we strongly recommend that you visit Kampa Web Site Hydrophores Category and take a look and get technical support.
Kampa is as close as a click with dozens of product options belonging to domestic and imported brands such as Master, Kampa, Pedrollo, Leo, Sumak hydrophore.
In this article, I tried to tell you“how to install the booster?” I hope it was useful. You can share your experiences and suggestions by commenting and share our article on your social media accounts.

